
Dreaming of a perfectly green lawn all year round without the endless mowing, watering, and weeding? Artificial Grass Carpet offers a stunning and practical solution. This durable, low-maintenance alternative to natural turf provides a lush, vibrant outdoor space for you and your family to enjoy. While it might seem like a complex project, a DIY installation is entirely achievable with the right tools and guidance.
This comprehensive guide will walk you through every step of the process, from preparing the ground to adding the finishing touches. We’ll show you how to transform your yard into a beautiful, low-maintenance lawn that looks fantastic in every season. Let’s get started on creating the yard you’ve always wanted.
Step 1: Planning and Measuring Your Space
Before you begin, careful planning is crucial for a successful installation. You need to accurately measure the area where you plan to install the artificial turf.
Measure the Area: Use a tape measure to determine the length and width of your installation area. If the space has an irregular shape, break it down into smaller, manageable rectangles or squares. Calculate the area of each smaller section and add them together to get the total square footage.
Order Extra Material: It’s a golden rule to order about 10-15% more synthetic grass than your calculated area. This extra material accounts for cuts, mistakes, and ensuring all the turf fibers run in the same direction for a uniform look.
Check Grain Direction: Artificial grass has a “grain” or pile direction, similar to a carpet. For the most natural appearance, you want the blades of grass pointing toward your house or main viewing area. Make a note of this on your plan to ensure you lay all pieces correctly.
Step 2: Gathering Your Tools and Materials

Having everything on hand before you start will make the DIY installation process much smoother. Here is a list of essential tools and materials you will need:
Tools: Shovel, wheelbarrow, rake, sod cutter (optional), plate compactor (rentable), utility knife with extra blades, measuring tape, carpet kicker (optional), and a stiff-bristled broom.
Materials: Artificial turf, base material (crushed stone or decomposed granite), seaming tape and adhesive, landscape stakes or nails (6-inch), and infill (such as silica sand or crumb rubber).
Step 3: Preparing the Installation Area
Proper ground preparation is the most important step for a long-lasting and professional-looking lawn. This stage ensures a stable, flat base for your synthetic grass.
Clear the Area: Begin by removing the existing lawn, sod, weeds, and any large rocks or roots. A sod cutter can make this job much faster, but a shovel and some elbow grease work just as well. Aim to excavate the area to a depth of about 3-4 inches.
Ensure Proper Drainage: A slight slope away from your house is ideal for drainage. If your yard has poor drainage, you might consider installing a more advanced drainage system, but for most projects, proper base preparation is sufficient.
Install a Weed Barrier: Lay a high-quality weed barrier fabric across the entire excavated area. This will prevent any stubborn weeds from growing up through your new lawn. Overlap the edges by several inches and secure them with landscape staples.
Step 4: Installing the Base Material
The base material creates a firm, level, and porous foundation for your artificial turf.
Add the Base Layer: Spread your chosen base material (like crushed stone) evenly across the weed barrier to a depth of about 3-4 inches. Use a rake to level it out as much as possible.
Compact the Base: This step is absolutely critical. Use a plate compactor to compact the base material until it is solid and smooth. You may need to go over the area several times. A properly compacted base prevents dips and uneven spots from forming later. Lightly spray the base with water to help it settle and compact more effectively.
Check for Levelness: Once compacted, your base should be smooth and firm. You have now created the perfect foundation for your new landscaping centerpiece.
Step 5: Laying the Artificial Grass
Now for the exciting part—rolling out your new lawn!
Roll Out the Turf: Carefully roll out the artificial grass over your prepared base. Be mindful of the grain direction you noted in your plan. Let the turf sit in the sun for an hour or two to relax and help remove any wrinkles from being rolled up.
Make Necessary Cuts: Use a sharp utility knife to cut the turf to fit the shape of your lawn. Always cut from the back side of the turf to avoid cutting the grass blades. Take your time with this step and measure twice, cut once.
Seam the Pieces Together: If you are using multiple pieces of turf, you will need to create seams. Place the two pieces side-by-side, ensuring the grain direction matches. Fold back the edges and lay seaming tape down the middle. Apply a generous amount of adhesive to the tape, then carefully press the turf edges back down onto the tape, ensuring they are tightly joined but not overlapping.
Step 6: Securing the Turf
Once your synthetic grass is perfectly positioned and seamed, you need to secure it in place.
Use 6-inch landscape stakes or galvanized nails to secure the perimeter of the turf. Hammer them in every 6-12 inches around the edges. Be careful not to trap any grass fibers under the nail heads. You can use your fingers to separate the blades around the nail before hammering it all the way down.
Step 7: Applying the Infill
The final installation step is to apply the infill. Infill helps the grass blades stand upright, adds weight to the turf, and protects the backing from sun damage.
Spread the Infill: Use a drop spreader to apply an even layer of your chosen infill (like silica sand) across the entire lawn. The amount needed will depend on the manufacturer’s recommendation.
Brush it In: Use a stiff-bristled power broom or a manual push broom to work the infill down into the base of the grass fibers. Brush against the grain to help the blades stand up straight. This gives your lawn a full and realistic look.
Conclusion: Enjoy Your Flawless, Low-Maintenance Lawn
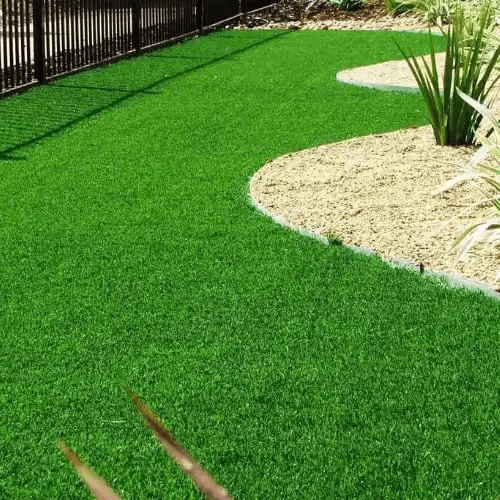
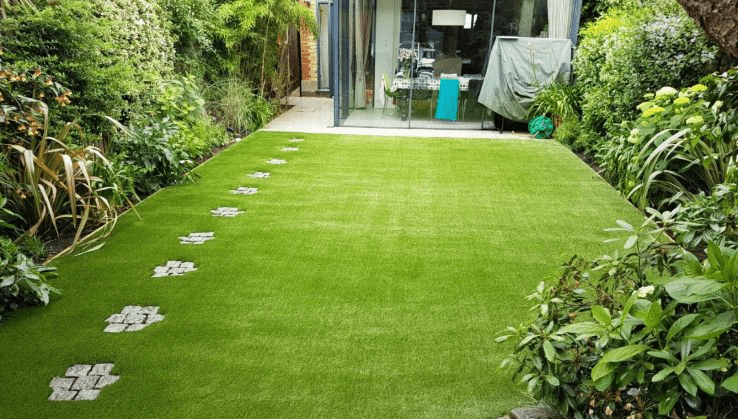
Congratulations! You have successfully completed your DIY installation of artificial grass. By following these steps, you have created a stunning, durable, and low-maintenance lawn that will be the envy of the neighborhood. Say goodbye to weekend chores and hello to more time enjoying your beautiful outdoor space. With its evergreen appeal and incredible durability, synthetic grass is a smart investment in your home and lifestyle.
Frequently Asked Questions (FAQs)
Q1: How long does artificial grass last?
A: High-quality artificial turf can last between 15 and 25 years with proper care. Its longevity depends on the quality of the material and the amount of foot traffic it receives.
Q2: Is artificial grass safe for children and pets?
A: Absolutely! Most modern synthetic grass is made from non-toxic materials, making it perfectly safe for both children and pets to play on. It’s also durable enough to withstand energetic play.
Q3: How do I clean my artificial lawn?
A: Cleaning is simple. For solid pet waste, remove it as you would on a normal lawn. For liquid waste or spills, rinse the area with a garden hose. For general debris like leaves, you can use a leaf blower or a stiff broom. It truly is a low-maintenance lawn.
Q4: Will artificial grass get hot in the summer?
A: Synthetic grass can become warmer than natural grass in direct sunlight. However, a light spray with a hose can quickly cool it down. Choosing a lighter-colored turf or one with advanced cooling technology can also help mitigate heat.
Q5: Can I install artificial grass on concrete?
A: Yes, you can install artificial turf over concrete or a patio. The process is slightly different, as you will need to ensure proper drainage and may use adhesive to secure the turf instead of nails. A shock-absorbing underlay is also recommended for comfort.