
Why Kitchen Appliance Storage Matters
If your kitchen counters feel like an obstacle course of cords, blenders, and that stand mixer you swear you’ll use this weekend, you’re not alone. The average American household owns 20+ small kitchen appliances, from air fryers to espresso machines—and most of them are fighting for the same limited real estate.
The truth is, poor appliance storage doesn’t just make your kitchen look cluttered. It wastes precious counter space, makes cooking frustrating, and can even damage expensive equipment when things topple or collect grease and dust.
Whether you’re a homeowner planning a cabinet upgrade or a renter squeezing the most out of a galley kitchen, this guide covers kitchen appliance storage ideas that are practical, budget-friendly, and genuinely beautiful. You’ll learn how to:
- Declutter counters without losing access to your favorite tools
- Protect and organize large and small appliances in cabinets, pantries, or offsite
- Build or buy smart storage solutions at every price point
- Style your kitchen so storage looks intentional, not hidden
Let’s turn your chaotic kitchen into a functional, phot-worthy space—one appliance at a time.
How to Assess Your Appliance Storage Needs
Before you buy a single organizer or drill a single hole, do a quick appliance audit. This step alone will save you time, money, and frustration.
Step-by-Step Appliance Audit
Step 1: List every appliance. Pull everything out—counters, cabinets, pantry, junk drawers, and that corner of the garage. Write it all down.
Step 2: Measure each one. Record height × width × depth in inches. These measurements will determine which shelves, risers, or pull-outs will actually fit.
Step 3: Rank by frequency of use.
- Daily: Coffee maker, toaster, electric kettle
- Weekly: Blender, air fryer, Instant Pot
- Monthly/Seasonal: Stand mixer, food processor, ice cream maker, deep fryer
- Rarely: Bread maker, waffle iron, specialty juicer
Step 4: Note power and ventilation needs. Some appliances (microwaves, toaster ovens) require clearance for heat. Others (espresso machines) need proximity to water.
Step 5: Photograph your spaces. Snap pics of your cabinets (with doors open), pantry shelves, and counters. Measure the interior dimensions: shelf height, depth, and width.
📋 Quick Audit Checklist
- Appliance name and model
- Dimensions (H × W × D in inches)
- Weight (approximate—important for shelf load ratings)
- Usage frequency (daily / weekly / monthly / rarely)
- Current home (counter, cabinet, pantry, garage, or “nowhere”)
- Ideal home (where it should live based on use)
- Cord length and attachment needs
- Ventilation or clearance requirements
Pro Tip: Keep a photo of this list on your phone. When you’re shopping for organizers at Home Depot or IKEA, you’ll have exact measurements to reference.
Counter vs. Hidden Storage: Choosing What Stays Out
Not every appliance deserves counter real estate. The rule of thumb is simple: if you use it daily, it can stay out. If not, store it.
What Belongs on the Counter
- Daily drivers: Coffee maker, electric kettle, toaster
- Aesthetic anchors: A colorful stand mixer or retro toaster can double as décor
- Heavy items used frequently: Vitamix or large espresso machine (too bulky to move daily)
What Should Be Stored Away
- Weekly/seasonal use: Air fryer, blender, food processor
- Bulkier items: Slow cooker, bread maker, deep fryer
- Mismatched aesthetics: If it clashes with your kitchen style, hide it
Styling Your Countertop Appliances
- Group by function on a tray or cutting board (breakfast station: kettle + toaster + coffee maker on a wooden tray, ~$20 at Target)
- Color-coordinate where possible—matching appliances or neutral tones reduce visual noise
- Use cord wraps or cord concealers to eliminate the tangle behind your appliances
- Leave breathing room: At least 2–3 inches between items for airflow and easy access
Quick Rule: Your counter should feel like a workspace, not a showroom. If you’re moving more than two appliances to chop an onion, you have too many things out.
Cabinet and Shelf Solutions
🔧 Key Section: This is where most of your storage gains will come from
Your cabinets are likely underperforming. Standard shelves waste vertical space, and deep cabinets turn appliances into buried treasure. Here’s how to fix it.
Adjustable Shelving
Most kitchen cabinets come with fixed, non-adjustable shelves. If yours has peg holes, you can reposition shelves to fit taller appliances. If not, shelf risers ($8–$15 at IKEA or Amazon) instantly double your vertical storage.
- Best for: Blenders, food processors, toasters
- Cost: $8–$40
- Renters: Freestanding risers—no drilling needed
Pull-Out Shelves and Slide-Out Trays
This is a game-changer for heavy appliances like stand mixers (KitchenAid mixers weigh 20–30 lbs). Pull-out shelves let you slide the appliance forward instead of dragging it across a shelf.
- Product example: Rev-A-Shelf Pull-Out Mixer Shelf (~$80–$150 depending on size)
- Installation: Requires mounting inside a base cabinet, moderate DIY skill, about 2–3 hours
- Load rating: Look for shelves rated for at least 50 lbs if storing a stand mixer
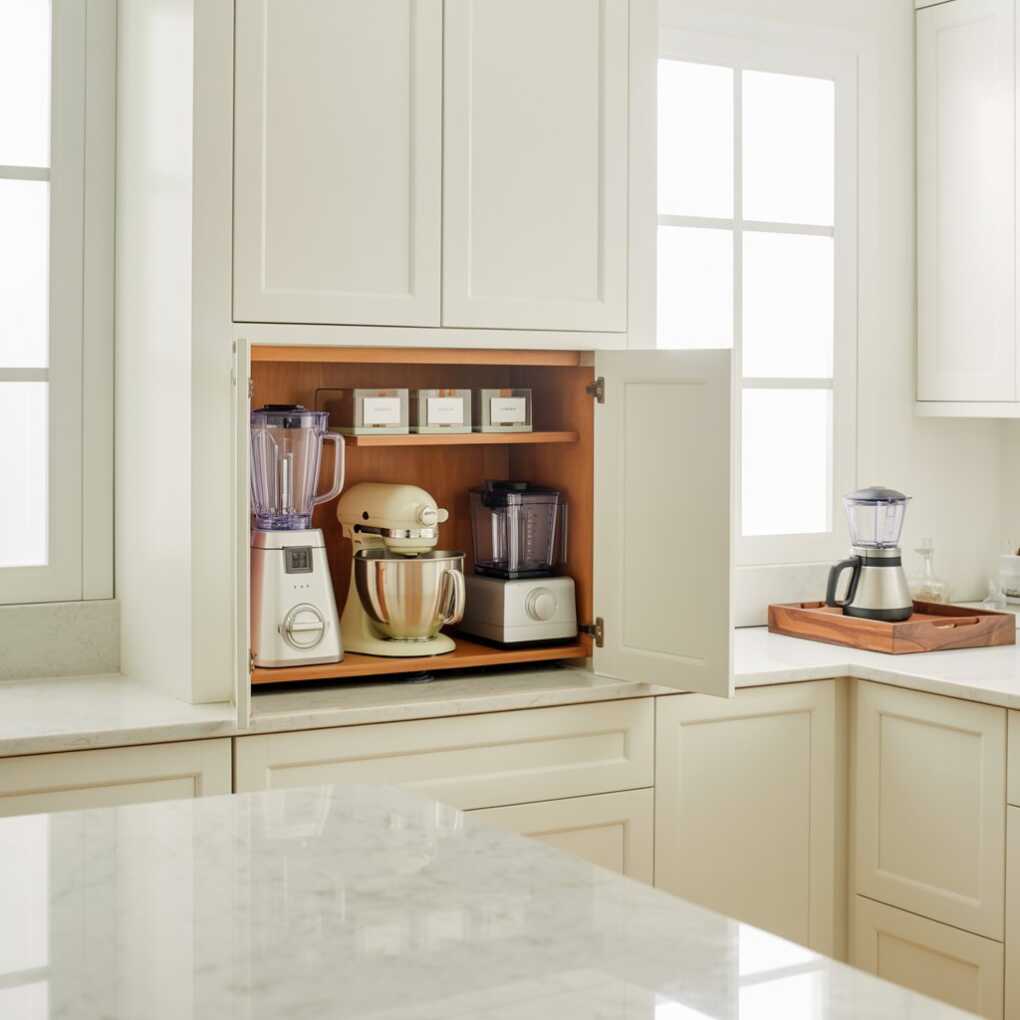
Appliance Garages
An appliance garage is a dedicated cabinet (often countertop-height with a tambour or flip-up door) that hides appliances while keeping them accessible.
- Built-in option: Custom cabinets, $300–$800+ installed
- Retrofit option: Tambour door kits from Home Depot, ~$60–$120
- Renter-friendly alternative: Use a large cutting board leaned against the wall as a “screen,” or invest in a countertop cabinet with a roll-top door ($40–$80 at Wayfair)
Under-Cabinet Storage
Use the dead space beneath upper cabinets:
- Under-cabinet microwave shelves: $30–$60, frees significant counter space
- Mug hooks or small-appliance hanging racks: $15–$30
- Adhesive hooks (renter-safe): For lightweight items like hand mixers
Lazy Susans
A lazy Susan in a corner cabinet or deep shelf turns dead space into accessible storage.
- Best for: Blenders, coffee makers, small appliances with attachments
- Cost: $15–$45
- Look for: Models with a lip or non-slip surface to prevent sliding
Deep Pull-Out Drawers for Heavy Appliances
If you’re renovating or have the budget, deep pull-out drawers (think 24-inch wide, 21-inch deep) in base cabinets are the ultimate heavy-appliance solution.
- Cost: $150–$400+ per drawer (custom or semi-custom)
- Best for: Stand mixers, slow cookers, large air fryers
Load-Bearing Guidance
| Shelf Type | Max Recommended Load |
|---|---|
| Standard particleboard shelf | 20–30 lbs |
| Plywood shelf (¾-inch) | 50–75 lbs |
| Pull-out shelf (steel slides) | 50–100 lbs (check rating) |
| Lazy Susan (plastic) | 20–35 lbs |
| Lazy Susan (wood/metal) | 50+ lbs |
Always check the load rating before storing a heavy mixer on a new shelf.
Pantry and Closet Organization
If you have a walk-in pantry, a cabinet pantry, or even a repurposed closet, you have prime appliance storage real estate.
Deep Pantry Shelves
Use the lower shelves (easy to lift from) for heavy appliances. Upper shelves work for lighter items like hand mixers or waffle irons.
- Clear bins ($5–$15 at Target or The Container Store) keep parts and cords together
- Label everything—front-facing labels so you can scan at a glance
- Shelf dividers prevent appliances from sliding into each other
Shallow Roll-Out Drawers
Install roll-out pantry drawers inside a tall pantry cabinet. These let you see every appliance without digging.
- Cost: $30–$80 per drawer (IKEA UTRUSTA or Rev-A-Shelf)
- Install time: 1–2 hours per drawer
- Renter-friendly alternative: Use stackable pull-out bins ($20–$40) that slide on the existing shelves
Seasonal and Holiday Storage
For appliances you use once a year (turkey fryer, cookie press, holiday stand mixer attachments):
- Store in the uppermost pantry shelves or a high closet shelf
- Use labeled plastic bins with lids to protect from dust
- Include a note inside: last used date, any missing parts
Vertical Storage
Some appliances can be stored on their side:
- ✅ Okay to store vertically: Hand mixers, immersion blenders, toasters (if secured), waffle irons (some models)
- ❌ Do NOT store vertically: Stand mixers (oil can leak), anything with a liquid reservoir, heavy items on tall narrow shelves (tipping hazard)
Always check your manufacturer’s manual before storing an appliance in a non-standard position.
Garage, Basement, and Offsite Storage Options
For appliances you use once a year or less, offsite storage frees up your kitchen entirely.
When to Store Offsite
- Specialty use only: Turkey deep fryer, large ice cream maker, grain mill
- Seasonal items: Outdoor grill accessories, canning equipment
- Duplicative items: Second blender, spare toaster oven
Garage Storage
- ✅ Pros: Accessible, spacious
- ❌ Cons: Temperature fluctuations, humidity, pests
- Solutions: Use sealed plastic tubs with desiccant packs; store on shelving units (not the floor); cover with appliance covers or old sheets
- Avoid: Storing electronics that are sensitive to extreme temps (check manufacturer specs)
Basement Storage
- ✅ Pros: More stable temperature than garage, typically accessible
- ❌ Cons: Humidity, flooding risk in some areas
- Solutions: Keep appliances at least 6 inches off the floor on shelving; use dehumidifier in damp basements; label clearly
Climate-Controlled Storage
For rare, expensive, or vintage appliances (that $600 espresso machine you use only on holidays):
- A climate-controlled storage unit ($75–$200/month) protects against humidity damage
- Wrap in acid-free paper or original packaging; include silica gel packets
Quick Storage Prep Checklist
- Clean the appliance thoroughly before storing (removes grease, food residue)
- Dry completely (prevents mold)
- Wrap cord separately with Velcro strap
- Place all attachments in a labeled zip bag
- Include a copy of the manual or a note with model number
Space-Saving Appliance Hacks and DIY Projects
🛠️ 3 DIY Projects to Tackle This Weekend
DIY 1: Pull-Out Appliance Shelf
Difficulty: ⭐⭐⭐ (Moderate — 3–4 hours)
Cost: $50–$100 in materials
What you’ll build: A sliding platform inside a base cabinet that holds a heavy stand mixer.
Materials list:
- 1 sheet ¾-inch plywood, cut to cabinet interior width minus ½ inch
- 1 pair of heavy-duty drawer slides (rated 100 lbs+, ~$25–$40)
- 4 wood screws
- Wood glue
- Sandpaper and finish (paint or polyurethane)
- Lip trim (optional, to prevent sliding off)
Steps:
- Remove existing shelf from base cabinet.
- Cut plywood to fit cabinet width, allowing ¼ inch clearance on each side.
- Attach drawer slides to cabinet interior walls and to plywood.
- Add a 1-inch lip trim on the front edge.
- Test with your mixer—adjust slide tension if needed.
DIY 2: Under-Cabinet Microwave Shelf
Difficulty: ⭐⭐ (Easy — 1–2 hours)
Cost: $30–$50 in materials (or buy a kit for $35–$60)
What you’ll build: A shelf that hangs beneath your upper cabinets, freeing counter space.
Materials list:
- 2 heavy-duty L-brackets (rated for your microwave weight)
- ¾-inch plywood shelf (sized to microwave footprint + 2 inches)
- Wood screws, wall anchors rated for load
- Paint or stain to match cabinets
Steps:
- Locate studs under the upper cabinets using a stud finder.
- Mount L-brackets to the underside of the cabinet, screwed into studs.
- Place the plywood shelf on the brackets and secure.
- Verify load capacity: most microwaves weigh 30–50 lbs, so your shelf + brackets must handle at least 75 lbs to be safe.
DIY 3: Countertop Appliance Lift for Stand Mixers
Difficulty: ⭐⭐⭐⭐ (Advanced — 4–5 hours)
Cost: $100–$200 (mechanism + materials)
What you’ll build: A spring-loaded lift that raises a mixer from inside a cabinet to counter height.
This is the premium DIY. You can buy a pre-made mixer lift mechanism (e.g., Rev-A-Shelf Mixer Lift, ~$150–$250) and install it in a base cabinet.
Steps:
- Choose a base cabinet next to your primary prep area.
- Remove existing shelf and door.
- Install the lift mechanism per manufacturer instructions (most require mounting to cabinet sides).
- Attach the platform and test with your mixer weight.
Tip: This is also a great upgrade to add to new kitchen cabinets during a remodel.
Smart Storage for Cords, Attachments, and Parts
Lost attachments and tangled cords are the silent killers of kitchen organization. Fix this once, and you’ll thank yourself daily.
Cord Management
- Velcro cable ties ($5–$10 for a pack of 50 on Amazon) — wrap cords neatly and attach to the appliance body
- Cord wraps/reels ($3–$8 each) — for very long cords (immersion blenders, hand mixers)
- Adhesive cord hooks on the back of appliances to keep cords tucked away when stored
- Label each cord with masking tape and the appliance name—especially helpful if you have multiples
Attachment Storage
- Dedicated Zip bags (gallon-size) for each appliance’s attachments: pasta maker discs, blender blades, mixer beaters
- Label the bag with the appliance name and list contents (“KitchenAid: whisk, dough hook, flat beater, pouring shield”)
- Use small stackable bins in a drawer (IKEA STUK or VARIERA series, $5–$15)
- Magnetic strips inside a cabinet door hold metal attachments like blades and beaters ($10–$20)
Manuals and Warranty Info
- Scan and save all appliance manuals as PDFs in a Google Drive or Dropbox folder (free apps like Adobe Scan work great)
- Create a “Kitchen Appliances” album on your phone with receipt photos and warranty dates
- For the analog crowd: A single binder or file box labeled “Appliance Docs” in a kitchen junk drawer
Safety Reminders
- Always unplug appliances before long-term storage
- Store in a cool, dry place away from heat sources
- Never store appliances with water inside reservoirs or carafes
- For gas-powered appliances (rare in most homes), store fuel separately per manufacturer guidelines
Style and Aesthetics: Making Storage Look Intentional
Good storage doesn’t just work—it should look good too. Here’s how to make your kitchen appliance storage ideas feel like part of the design, not an afterthought.
- Match organizers to your kitchen palette: White wire baskets for modern kitchens, woven seagrass bins for farmhouse style, matte black trays for industrial looks
- Use cabinet fronts and integrated panels to hide open shelving with appliances behind closed doors
- Open shelving as display: If you have a beautiful copper espresso machine or a retro Smeg toaster, make it a focal point with intentional styling—flank with plants, cookbooks, or ceramic canisters
- Consistent containers: Swap mismatched storage bins for a matching set (same color, same material). This single change transforms a pantry from chaotic to catalog-worthy.
Photo staging tip: When photographing your kitchen for social media or a listing, hide the everyday appliances in closed cabinets and leave only 2–3 styled items on the counter. The “lived-in but tidy” look always wins.
Product and Retailer Suggestions
Here are 10 US-friendly products, grouped by budget, to jump-start your appliance storage project:
Budget-Friendly ($5–$40)
| Product | Retailer | Why It Works |
|---|---|---|
| STÖDJA Shelf Risers (set of 2) | IKEA | Affordable, clean look, fits most cabinets |
| Velcro One-Wrap Cable Ties (50-pack) | Amazon | Essential cord management, under $8 |
| Clear Stackable Storage Bins | Target (Brightroom brand) | See-through, labeled, budget-friendly |
| Lazy Susan Turntable (16-inch) | Walmart | Great for corner pantry shelves |
Mid-Range ($40–$150)
| Product | Retailer | Why It Works |
|---|---|---|
| Rev-A-Shelf Pull-Out Mixer Shelf | Home Depot | Steel construction, 80-lb capacity, smooth slide |
| Under-Cabinet Microwave Shelf Kit | Wayfair | Frees counter space, multiple finish options |
| Seville Classics UltraHD Shelving Unit | Amazon | Garage/basement storage, 350 lbs per shelf |
Premium ($150+)
| Product | Retailer | Why It Works |
|---|---|---|
| Rev-A-Shelf Mixer Lift Mechanism | Crate & Barrel / Home Depot | Spring-assisted lift, seamless cabinet integration |
| Enclume Pot & Appliance Rack (ceiling-mount) | Williams Sonoma | Industrial-chic overhead storage, holds heavy items |
| Custom Tambour Door Appliance Garage | Local cabinetmaker or Home Depot design center | Fully integrated, matches your cabinetry |
Maintenance Checklist and Closing Tips
Great storage only works if you maintain it. Here’s your quick upkeep plan:
Monthly (5 minutes)
- Wipe down appliance surfaces and storage shelves
- Check cord wraps—re-secure any that have come loose
- Verify that pull-out shelves slide smoothly (apply a drop of silicone lubricant to tracks if stiff)
Seasonally (15 minutes)
- Rotate seasonal appliances (bring the ice cream maker out for summer, store the slow cooker up high in spring)
- Check for dust, pest evidence, or humidity damage in garage/basement storage
- Review your appliance audit list—sell or donate anything you haven’t used in 12 months
Annually
- Deep-clean all stored appliances before putting them back (vinegar-water wipe down, descale coffee makers)
- Review warranty dates and update your digital doc folder
- Assess whether your storage system still fits your needs—life changes (new baby, new cooking hobby) may call for a reorganization
Ready to Reclaim Your Kitchen?
You don’t need a full renovation to transform your kitchen. Start with one cabinet, one appliance, one hour this weekend. Move that stand mixer to a pull-out shelf, clear off the counter, and see how the space breathes.
The best kitchen appliance storage ideas aren’t about fancy upgrades—they’re about knowing what you have, giving every item a home, and keeping your space working for you.